Hello again

Safelight

Hello, been a while. Not much photography action has happened since we went to Iceland, besides developing film. Travis and I moved from Ohio to Indiana earlier this year, so all of our energy was focused on that, the packing and the moving and the unpacking. But we’re here now, mostly unpacked, and finally ready to get the darkroom back up and running. I think that our new bathroom/darkroom solution will be a lot better than what we were doing at our old house, but there are still a few things I need to get figured out. I’ll probably do a new darkroom post once we get everything sorted.

In the meantime, I’ve been doing a wee bit of lumen prints. It’s good to mix up some fixer and make simple prints, even if I’m not ready to do anything else.

More Mushrooms

Mushrooms are creepy.

My first project for when we are up and running with the darkroom (in the next few days, hopefully), is to try making some contact prints with this bit of awesomeness Travis scored for me at an antique mall:

Agfa Lupex

That’s right – an unopened box of 1940s-ish Agfa Lupex postcard sized contact paper. I love old Agfa, I love contact paper, and I especially love postcard paper. I have no idea how well the prints will turn out. The one example I found online of prints on Agfa Lupex came out pretty low contrast, but with antique paper there is just so much variation in how things were stored there’s no way to know how a specific paper will react until you try it. If nothing else, I may be able to make lumen prints from it.

Churchie's Spy Camera

This was another antique store find. It’s the cheapest 127 camera ever. We love it.

I would love to load it up with some film, but we’ve got a huge backlog of cameras with partial rolls of film shot in them. It’s embarrassing. So that’s also on the agenda – finish shooting the film in all of these random cameras so they can finally be developed, poor things. I have camera guilt. They just keep… looking at me, all sad and half-shot.

Another thing on my agenda to do is become better acquainted with the Nikon D5100. I use it all of the time, but still feel like there are so many functions I don’t use because I either don’t know they’re there, or am not sure what button to press. I just today learned about the different focusing modes on the camera (still subjects versus action, etc). Yep. Seems like something I should know about.

I got out the super dark infrared filter and popped it on the Nikon this afternoon, playing around with digital infrared. It was windy, so everything turned out blurry, but I liked this shot:

Rudbeckia

Downsizing

Hraunfossar

Hello! I’m still here! We successfully managed to go to Iceland and return! Yay!

As is achingly obvious, I haven’t updated the blog in a while. That’s due not to a lack of interest about photography, but just a general all around malaise that has come from feeling that major life changes need to be made. Long story short, Travis and I have decided to blow this pop-stand and get the heck out of Dodge (read: Ohio). So right now our nebulous plan is to spend the fall and winter fixing up our house and getting rid of a bunch of our stuff, and then next spring move out of state.

Abandoned

(Our house doesn’t look this bad – or this cool – but we definitely need to do some work before we put it on the market)

It’s exciting finally having a plan and a concrete goal. We’re probably going to move to a smaller place, at least for the interim, so I’m trying to downsize a bunch of our possessions. It is time to scatter my earthly belongings all over the Goodwills of central Ohio! Well, maybe not that extreme, but I’ve accumulated a bunch of possessions over the past ten years that I definitely don’t need anymore. Sno-cone maker, I’m looking at you.

The end goal is to get us to a place where Travis actually works decent hours, or a schedule, like a normal human. Hopefully, we will also be a lot more organized and clutter-free, which will let us have the space to do some of the things we would like to do more of (photography related stuff and crafty related stuff for me, and homebrewing and general tinkering stuff for Travis).

Tree sweater

Also we’re planning on moving some place where we can get a lot better food than what we can find around here. Calzones and Italian sausage, here I come!

Anyway, this all leads me back to doing some shameless self-promotion. I try not to be all, “Oh, hey, I’m selling photography junk, so BUY MY STUFF NOW!” but I thought it might be worth a mention that I’m going to be doing some major updates to my Etsy shop this fall and winter. I have a lot of photography related equipment, film, paper, etc that I’m going to be offering for sale. I’m definitely not getting rid of everything (You can pry my mint green Savoy and my 8×10 contact printer from my cold dead hands), but there is a ton of weirdness and cool things I’ve picked up along the way that needs to find better homes than what I can currently offer. Because there is so much stuff I’m going to be posting, my item descriptions may be a little shorter than usual, but as always, if you have any questions about anything, just send me an Etsy convo. My shop also accepts credit cards now directly through Etsy, so you don’t have to deal with Paypal anymore if you don’t want to (hooray!).

As for Iceland? It was pretty amazing. I would highly recommend visiting there, especially if you (like us) were using it as your first trip abroad. Dealing with customs, driving in a new country, etc – all of that wasn’t scary at all. The hot dogs were freaking amazing. You can see some more of the Iceland pictures in my set on Flickr. It really inspired us to want to see more of the world (next stops: Costa Rica, Ireland, and Zambia!), but that will probably have to wait a little bit until our life settles back out again.

I made a new thing!

116 Pinhole Camera

So, we’re going to Iceland.

Travis and I normally go on vacation in the fall. We take camping vacations normally, and go in the fall after all the kids are back in school. But, things have changed this year! Travis wound up getting two weeks of vacation in May. We sold our crappy camper. And, in a major turnaround, we decided to take our first big international trip (sorry, Canada, I love you, but the few little trips we’ve taken across your borders don’t really count as international travel).

So, we’re going to Iceland! We were kind of considering three different destinations – Iceland, England, and Ireland – for our first trip, but Iceland won out. I think it’s a good choice for our first trip abroad. Almost everyone speaks English. They drive on the same side of the road as the US. It’s a small country – the size of Ohio, with a total population about the same size as Columbus, so we hopefully won’t get too overwhelmed. Most importantly, though, it’s gorgeous. There’s all sorts of awesome nature-y things going on there: volcanoes, geysers, waterfalls, whales, puffins, etc.

Anyway, we’re extremely excited about this. However, in all that excitement, I’m also a little worried, because this is our first trip abroad, and I haven’t been on a plane since about 2005, so I haven’t dealt with the new TSA screeners and I’ve never had to deal with going through customs and such before. I don’t want to screw anything up. So I’ve been trying to figure out what camera gear we’ll be taking, taking into consideration our luggage weight restrictions.

I think I’ve got it set. Travis and I are each taking a digital camera, and honestly, I think I’ll probably be taking a lot more digital camera pictures this vacation than I have in the past few. We’re taking our GoPro. But we are taking some film cameras too, and as much film as I can stuff into our carry-on luggage. The Yashicamat is going. The Olympus Pen-EE2 is going. The Nikon FM2N with the Lensbaby lens is going. And that was it. Tragically, the Savoy is staying at home. The Polaroid 230 didn’t make the cut either. I know, it is so sad!

And, of course, none of the large format cameras are going either. I just don’t think I’d have room for a Speed Graphic, sheet film, film holders, and changing bag in the carry-on luggage, not and take any other camera. It is tragic, going to a place as gorgeous as Iceland, and not being able to take any large format camera.

This bummed me out, so I decided to make the next best thing – a relatively compact pinhole camera that takes 116 (70mm) film. I used the body from an old, funky Kodak Autographic folding bellows camera as my base. I tore out the face, bellows, and bed of the camera, and constructed a simple front made out of black foamcore. I covered the whole thing in fabric (since the leatherette was nasty and half-gone anyway), strapped it together with Velcro, and was good to go.

116 Pinhole cam, laying down

I ran a test roll through it today, using some expired 70mm Konica Minolta Professional 160 color film respooled onto a 116 spool. My backing paper is kind of torn up along the edges, and I think I had a small light leak going on in addition to that, but no big deal.

I’m not sure how big the pinhole is that I’m using. I salvaged it from an old 4×5 pinhole camera I had torn up for some reason. I wasn’t sure what to use as an exposure time, so I did various shots at between 2 and 10 seconds. Everything I tried seemed to work okay, weirdly, although I think 5-8 seconds in bright light is the sweet spot.

This was at 6 seconds:

Dodge Dart

7 seconds:

David's Van, again

8 seconds:

Vise

So, yeah, kind of light-leaky. I think that might be partly from the Autographic door in the back of the camera, so I’ll have to try sealing that shut. Otherwise, I’ll just throw an extra few rubber bands on it and call it done. I’m less bothered by light leaks than I probably should be.

Anyway, we also did some C41 developing today (yes, we still have a bunch of film from last vacation we haven’t developed). We used the Rollei Digibase color chems for the first time. All the chems are liquid, and are supposed to have a longer shelf life. I’ve only scanned in a few rolls, but it looks like it did a decent job developing. An interesting thing about the Rollei chems is that the Bleach and Fix steps are separated, as opposed to a combined Blix step like in the other C41 kits I’ve used. This makes the Rollei chems a good candidate for trying bleach bypass the next time we do some C41 developing.

Winter Lith! Caffenol Fail!

Pacific Lith

You know, I really like making lith prints, because I am so into the MAGIC of it – it pleases me so damn much that one can, through use of a diluted developer, produce images that have beige, brown, gold, olive, red, or other tones to it on black and white paper. How freaking cool is that?

What I’m not especially crazy about in regards to Lith printing is how incredibly long it can take to make a print. That part sucks. If I had a great big darkroom area and could put out a gigantor tray of lith devloper so I could process multiple prints at once, it wouldn’t be that big of a deal, but instead I’m working in my narrow bathroom, stuck between the table with the chem trays on it and the bathroom sink, in the dark, alone, and scared. And, of course, it’s winter, and I didn’t think to try to rig up a heating pad under my lith tray to bump up the temps (warmer lith developer temps will allow the image to develop faster). My house is around 68 degrees right now, and the developing times were sloooooow, like around 20-30 minutes for a print. Kill me now.

Savoy Lith

I tried out a few new old papers to lith this time. Some stuff didn’t work, but this paper, circa 1951 Ansco Indiatone Kashmir paper, lithed like a dream. Of course, it makes regular prints like a dream, too.

Savoy on Indiatone

Love this paper. SO MUCH.

I also tried out my Kodak Polymax Fine Art paper that seems to be fogged. This is the 16×20 paper that I cut a few pieces down for experimentation. It kind of lithed…

Orca Lith

I’m not sure why it came out so splotchy. Maybe the paper had some kind of slight water damage to it? At least it did something, and I’m willing to give it another go with warmer chems.

Finally I whipped out some of my Agfa Cykora Kashmir paper that gave me such a good result with this lith print last year:

Tree and Dunes, lithed

I used 3 minute long exposure under the enlarger and had it in the lith devloper for 9 minutes. As a contrast, I did this test strip for the new lith print:

Cykora test strip

I used 20 second increments and wound up going with the darkest strip (80 seconds) to base my exposure on. I ultimately did a 5.5 minutes enlarger exposure for the lith print, which is a crazy long time to listen to my Gralab digital darkroom timer beep every second. I felt like I was on ’24’ waiting for the bomb to go off.

Here’s the resulting print, about 25 minutes later (see! I told you my chems were cold! And probably exhausted, too!):

Wapa lith

On a different subject, Travis has been interested in using Caffenol lately as a developer. For the uninitiated, it’s an instant-coffee based developer. The base ingredients used are instant, caffeinated coffee, water, washing soda, and Vitamin C. We used soda ash in place of the washing soda (I’ve previously used soda ash interchangeably for washing soda when I was dying cotton fabric), and citric acid in place of the Vitamin C. We took some shots on 3×4 sheet film to test out, and began to develop.

Where I think we went wrong, in retrospect, was that I had the brilliant idea to try developing the sheets of ortho lith film we had shot first. The ortho film is able to be handled under a red safelight, so I thought, great, let’s try developing this in trays first so we can watch how the film develops and judge how long it takes. Unfortunately, what I didn’t realize is that apparently the developing takes longer with a slower speed film… and we were shooting our ortho lith film at ASA 12.

About 25 minutes later, we saw only the barest hint of development in the negatives, and finally I just said “Screw it,” and whipped up a quicky batch of print developer (fortunately, I had the concentrate stored under the bathroom sink… in case of emergencies, I guess?), and we threw the caffenol-soaked negatives in there. They developed about 2 minutes later, looking no worse for the wear.

Samoca and apple

Travis tried developing another pieces of sheet film (100 speed this time) in the Caffenol in a tank, but it just came out completely blank. I think the Caffenol had gone weird by that point – I guess it has a really short shelf life. So, anyway, a FAIL, but something we’ll probably try again. Just not with ASA 12 film.

Since I wound up making a small batch of the print developer anyway, I put it to good use making some cute little contact prints using some circa 1970s FSC Contact paper.

Kiwi

This is another paper I love, even though it’s glossy (I kind of hate glossy paper). It’s weird, some prints tend to go brownish, and others made on the same paper went a lot colder in feeling.

Buick Regal

Same paper. Weird, I know. It probably has something to do with the time spent in the developer.

Hello again!

Jacki with a graflex

After months of not doing much, photography-wise, Travis and I finally got back in the swing of things this week. We did several things! First, we spent a few hours doing basic black and white embiggenments. It took me a while to remember what the hell I was doing, and also, how to do it.

Travis (about 6 or 7 enlargements in, where our exposure times under the enlarger have been really long): What aperture are you using?
Me: … I have no idea?

Good times! Anyway, the goal of the session was to see if an unopened box of big-ass, 16×20 Kodak Polymax fiber-based paper was still any good. Judging by how the test strip came out… not so much. Looks fogged. So, it goes into the the Lith pile. I managed to find a picture online of someone using the same paper to make lith prints, so that’s good, anyway.

Since the Polymax was a bust, we moved on to making some prints using 8×10 Arista Classic paper from the mid-70s that I got last year in my Epic! Ebay! Paper Haul!. I was curious as to how some of those World War II/Paris Liberation negatives would print.

Balcony

Hey! Pretty good!

Liberation

Duration Plus

Man, I love using Arista paper. That stuff is so reliable.

The next day we responded to the Photography Bat Signal of BABY SHEEP!! and headed out to a friend’s house to check them out.

Red Sheep

Ack! So cute!

Sheeplets

O hai!

We also took along a newish (to us) camera, a Japanese Samoca 35 Super.

Samoca 35 Super

Nifty looking, isn’t it? It’s a rangefinder, and 35mm, neither of which are my favorite things, but the camera looks so damn cool, it’s worth using just to get style points. There was a mystery roll of Sakura Konipan SS film inside of it, which, when shot, gave us images like this:

Sakura Lamb

Fortunately, we tested out the camera with some relatively more stable Kodak Plus-X, too. The camera is a little tricky to use – what you intuitively think is the focusing mechanism actually controls the aperture, and the rangefinder dot isn’t very bright, so it was kind of goofy to focus. Plus, the sheep kept moving around. However, we were able to get a few decent shots.

Sheepy Face

Yesterday, I finally got up the nerve to try playing with the Berg Color Toning System I got off ebay a while ago. The results were kind of meh.

Color Toned Egg and Pon Tiki

I mean, I’m not too sure what I was expecting. I think I thought the areas that were black in the original print would kind of stay black-ish after it was toned (dyed, really – turns out the Berg system is actually a dye, not a toner).

Color Toned Strawberry

So, I don’t know. It was kind of fun to mess with, but not OMG THIS IS AWESOME!!11!!. I suspect that my chems were kind of weak due to age, so I’d be willing to try this again with some fresh activator, but it’s nothing I’m going to go out of my way to do over and over again. Also, the instructions were kind of vague-ish, I thought. Not cool, Berg.

Color Toned Kodak Timer

I did find out it was possible to tone (dye) a lumen print, though. I wasn’t sure if it would react weird to the activator or clearing solution, but it turned out all right.

Color toned Lumen print

Found Saturday – Serendipitous Veteran’s Day Edition

Liberation of Paris

Yesterday – Veteran’s Day – Travis and I were in Cleveland Heights, Ohio, and we wandered into an antique shop. There, we found 4 boxes of old black and white 35mm and 4×5 negatives, and of course, I bought them all without even glancing through them to see what the subject matter was.

I didn’t start going through them until this morning. At first, the pictures seemed kind of mundane – the 35mm looked like it was mainly family shots, pictures of babies, that type of thing. However, there was one little strip that had some photos of what looked to be Mont St. Michel. Sure enough, the edge of the film said “Kodak France.”

Military Police

So, I started flipping through the large format negatives only to discover that the majority, if not all of them, look like they were shot in immediate post-war France, particularly during what looks to be the Liberation of Paris, which would date the photos to late August 1944.

Under the Eiffel

Surprise! Happy Veteran’s Day!

At the bar

I’ve only scanned in a handful of these pictures, and have really only looked through one box of four of the negatives, but there’s a *lot* of interesting pictures.

The joint committee of Communism and Socialism?

I was trying to track down the history of this aircraft:

Duration Plus

Of course, I know nothing about planes, and the only “Duration Plus” I’ve managed to find a mention of on the Google says that it was a B-17 bomber, and that it crashed in Germany on September 13, 1944. I have no idea if that is the same plane as this one, but if it was, how strange that it was on display in Paris under the Eifel Tower for the liberation celebrations, and then was destroyed in Germany about 2 weeks later?

(And of course, due to the amazing power of Teh Internetz, in the time it took to type out that paragraph, I got confirmation that the plane is indeed a B-17! Thanks, iPlaid!)

Somebody important

If you give a soldier a camera...

I uploaded a bunch of these pictures – they’re on my Flickr if you want to see more of them.

Still more adventures in RA-4!

Hug Beach

A few days ago we dragged out the RA-4 chems to see if they were still good. I’m working my way up to making an epic Freestyle order, and wasn’t sure if I needed to order more color print chems. Turns out, the unmixed RA-4 chems stay good for forever, but I also mixed up the last bit of what I had, so I need to order some more anyway.

I’ve been using this Fuji paper to make color prints since, unlike almost everything else I have, it’s fresh and in-date. It’s supposed to be kept under 50 degrees Fahrenheit, but I’ve just kept the box at room temp since I’ve gotten it. I don’t have room in my fridge for more photo stuff. It’s bad enough already. Anyway, the paper doesn’t seem to have gone weird, and we were able to get some pretty good prints from it.

Cacti Print

This, however, isn’t one of the better ones. It’s a print from some cross processed 35mm Kodak Color Infrared film, respooled onto 120 backing paper, and shot in the Yashica-Mat. It’s not that great of a picture anyway (it’s interesting… but that’s about it), but I was curious to see how the color infrared worked as a negative. This particular picture was shot with a red filter, but I shot others with yellow, orange, and green filters, so I may have to try making a print of some of those to compare.

A better print is this one, which came from a C41 Kodak Ektar 4×5 negative.

Nile II

I was very happy with this print. The colors actually look like reality, which is what I was going for! Yay! Also, 4×5 just kicks ass. I’ve completely gone off 35mm. The more I work with actually printing photos, the less use 35mm holds. The difference in the grain is stunning. For a comparison, here’s a section of the boat picture at 100%:

Nile II detail

And here’s a similar section of the cactus print at 100%:

Cacti detail

That may not be a completely fair comparison, since the cactus picture is cross processed, which tends to make things more contrasty, but still, it doesn’t make me want to shoot a ton of 35mm.

Not that there’s not still uses for 35mm, though. I made this print from cross-processed Kodak E100G 35mm, respooled onto a 620 spool and shot through the Savoy. It’s not exactly sharp, or has realistic colors, but it’s still fun.

Dinosaur

Travis also shot a ton of 35mm film on vacation using a little Olympus Pen-EE camera. It’s a half-frame 35mm camera, which means instead of getting 36 pictures of a long roll of 35mm film, you get 72 half-sized pictures. So, yeah, the image quality is not great, but it’s a fun little camera to use.

Penguin

We made a few prints using some of the Pen-EE negatives yesterday. One of them came out especially neat (cross processed Kodak Electronic Output film), but Travis doesn’t have them up in his Flickr yet. So, the Pen-EE is a cute little camera, and it’s fun to make pairs or trios of smaller prints on one sheet of color paper.

It was my intent to do more color printing today – I might as well keep going until the chems are all used up – but I found myself making stupid mistakes and it got to the point where it wasn’t fun. And if it’s not fun, then I probably need to take a break from it. I’ve got some weird stuff I want to try with the remaining chems, though, so I’ll probably be back at it tomorrow.

Oh, one thing that is potentially interesting is that Freestyle is now carrying their own brand of color paper. I’m excited! It looks like they’re getting it in stock in a few days, and I’m definitely going to get some and try it out. It’s slightly cheaper than the Fuji paper (which I like, and have had good results from), but the main benefit I immediately see is that you can buy the paper in boxes of 50 for the smaller sizes, as opposed to Fuji, where you have to commit to a box of 100 sheets for anything smaller than 16×20. That being said, I’m kicking around possibly ordering a box of gigantor paper (16×20 or larger) to try making UBER PRINTS. It’s not like I have any wall space to hang prints that size up on. I just want to make a gigantic print. It seems fun. (I think I used the word “fun” about 80 times in this post. Yay?)

Redscale, again

Dinosaur

I’ve experimented with redscale photography before, with varying results. (Just a refresher: redscale photography refers to the technique of shooting color film with the emulsion side facing away from the lens. This involves running the film through the camera backwards). I’ve liked the results that other people have gotten from redscale film, but have just been more or less meh on the shots I’ve taken.

However, during the great Respooling Odyssey of 2011, when I was getting all of my film ready to take on vacation, I went a little crazy and wound up buying some of Rollei Nightbird film (pre-flipped redscale film) and respooling several rolls of 35mm redscale film onto 127 or 120 backing paper.

For distant views

This picture and the one at the beginning of this post were both shot on a roll of expired Fuji X-Tra 400 speed 35mm film, flipped for redscale, and respooled onto 127 backing paper (shot through the Ward’s 26 camera). This is pretty typical of how redscale generally looks – the majority of colors are tones of yellow, orange, and red.

What I had wanted to try in addition to just shooting the redscale normally was seeing how it came out when it was shot in conjunction with a filter. So, for this roll of expired 800 speed Kodak Gold Max, I taped a small section of a teal gel over the inside of the lens (again, I used the Ward’s 26). I made sure to use a faster film for this, since redscale film in general is like shooting through a red filter (the base color of the film), and I was adding an additional dark filter on top of that.

I didn’t really know what to expect, although I guessed I’d get results that were dark brown. I shot the roll on a very gray, misty morning that didn’t have much going on in the way of color.

Ruby Beach

As you can see, the redscale film plus the teal filter resulted in green tinted images.

Rocks

So, that’s kind of neat. I packed more redscale film than I actually wind up shooting, though, so I still have some more filter experiments I want to try with it (if I shoot with a straight blue filter, will I get purplescale images?). We only managed to develop a little under half of the C41 rolls of film we shot before I started to get paranoid that our chems were going wonky. So, I need to restock.

Hello!

Shoe Tree

So, we’re back. Actually, we got back home to Ohio last week, but there’s been a confluence of drama since then (some family stuff, some health-related stuff, and a good heap of drama with our camper – here’s a tip for you: don’t buy a Rockwood. Worst. Camper. Ever.). Anyway, it turns out I did pack a boatload of film that we didn’t wind up shooting, but not by much. I think we shot all but one or two rolls of the 20+ 620 film I had respooled, and quite a bit of the 127 film.

Surf

What I barely shot was any 35mm film. Even though I had a boatload of fun, weird 35mm films to use, even though I love my 35mm Nikon FM2N outfitted with the Lensbaby, I had to force myself to use it. I don’t know. The more photography stuff I do, the less I see the point of 35mm. I just like working with the larger format negatives so much more.

So, the cameras I did wind up using! The Polaroid 230:
Great Basin

The Yashicamat:
Sol Duc Falls

The Speed Graphic (Zarl!), of course.
Newport

The Savoy, although I haven’t uploaded any vacation photos from it yet, and, to a lesser extent, the Ward’s 26 127 camera, the Bollywood pinhole 4×5 camera, and Watson, the 5×7 camera.

All we’ve managed to develop so far is the black and white film. I accidentally fogged a chunk of our 4×5 black and white negatives (sad trombone), which kind of sucks, but things like that inevitably happen when you’re loading and unloading film on the fly. The majority of the film we’ve shot is process C-41, which we haven’t even started to develop yet.

After looking over the black and white negatives, though, I know one thing – if I had this vacation to do over again, I’d take less pictures of waterfalls.

Madison Falls

I can’t help it. I don’t exactly live in waterfall country, so whenever I see one I instinctively take photos of it, which is fine, but seriously? I could have stepped back a bit from the waterfalls. Less waterfalls. More other things. I guess I took so many waterfall pictures that any pictures of other subjects, like this one:

Spinning wheel

…automatically stand out to me.

We were gone for a month, and it was easy to get in the habit of drive, drive, drive, get to a “Destination,” and stop and take pictures, automatically. The interesting pictures, the ones I’m drawn to now, are the ones we took not of a big major scenic Event, but of smaller things, like the awesomeness we ran across in Forks, Washington:

Twilight Sucks

Or being so bored while doing about 18,000 loads of laundry that I brought the pinhole camera inside the laundromat and amused myself for a while:

Ghost of the Laundromat

We still have a boatload of film to develop from the trip, so we’ll keep slogging through the developing and the scanning. I’m looking forward to making prints already!

Getting ready (and accidental Found Monday!)

So. Much. Film.

So, I’m still working on getting our cameras and film ready to take on vacation. Almost everything is done – I’ve got the rollfilm and 35mm film sorted and respooled. Almost all of the sheet film holders are loaded. I remembered to grab an armful of Fuji Polaroid film boxes. I’ve got a few sewing related things I need to get done – the elastic on our big dark bag snapped, so I need to repair that before we go, and I’m trying to convert a big Trader Joe’s insulated shopping bag into a suitable camera bag for our 5×7 camera, Watson.

Yeah, I decided to take Watson instead of hauling around the big-ass 8×10 pinhole camera. The problem with the pinhole camera (besides the fact that it’s gigantor) is that I think I want to eventually replace the pinhole on it. The one that came installed on the camera just isn’t sharp enough for my liking, so I’d like to try to improve on that. Until I do so, I don’t want to waste my precious stash of 8×10 slide film on mediocre pictures.

Watson, however, is a bonafide large format camera with a real lens and everything! Travis and I took a few cameras out the other day to do some final testing before we left, so I grabbed Watson to see how he performed in the field. He weighs about the same, or maybe even a little less than my 4×5 Speed Graphic, and folds up nicely.

Watson 5x7 camera, folded up

The downside to taking Watson is that the only film I can shoot with him on the road is my Fuji X-ray film. I have some old, old Kodak Aerocolor film that expired in 1985 that’s on a roll, but that’s a pain to work with, and I’d be too flustered while traveling to deal with it (also, it’s C-22 or something, so I’d have to develop it in cold chems – not that big of a deal with roll film, but a pain in the ass if I’m trying to do large format film). The Fuji X-ray film, on the other hand, is black and white, but fortunately has a double-sided emulsion, which means I can’t screw up how I load the film holders. That’s nice, because the film doesn’t have any notches letting you know which way to load it.

Anyway, I wanted to try out the Fuji X-ray film one more time before committing to take Watson. We hauled him up to the cemetery and took a few shots.

Cooper C. Jackson

Okay, not the most interesting photo ever, but still, I was pleased with how sharp the image was. I also tried taking a picture using a yellow filter over the lens. The X-ray film apparently can’t be used with a red filter (it reads reds as black, I think), and I wanted to see if the yellow filter would help bring out the sky and clouds. The resulting picture showed maybe a little darkening of the sky, but nothing really awesome, and was also not as in focus as the above photo. I think that might have something to do with the fact that we had to manually hold the filter over the lens, since I don’t have a proper filter mount for the lens on Watson. I’m probably not going to mess around with filters with this camera for the most part.

So, Watson is a go, but that means I have to cut down a bunch of my Fuji X-ray film to 5×7, since I only have it in 5×12 size. So! Tedious! Hopefully it’ll be worth it, though. Since I’ll be using Watson, I also have to remember to bring a dark cloth to use when I’m trying to focus the camera. I’d love to go full-out Ansel Adams and build a camera platform on top of the truck and take pictures that way. I won’t be a truly hard-core camera nerd until I do that.

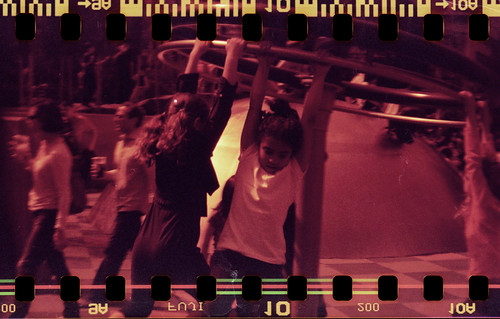
I also wanted to test out my gel filters before we left, too. I made some improvements on my Bollywood Pinhole camera to keep it from being lightleaky, and also making it tripod-friendly. So, I was able to mount it on a little tripod and take a few pictures with the gel filters taped to the inside of the camera. Here’s one shot using a turquoise gel filter:

Harry R. Deem

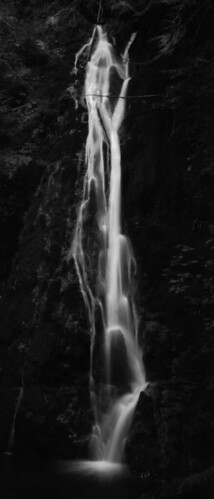
The final thing we wanted to try out was shooting with 4×5 Kodak High Speed Infrared film. I’ve shot a few pictures with it before, like this one:

HIE test shot

…but I wanted to try rating it at different speeds. That photo was shot rating the film at 200 using a red 25 filter, and it looks decent, but I wanted to see it shot rated at 100 to see if there was much difference. I also wanted to see if it worked in the Bollywood pinhole camera using the red gel filter, and in Travis’ 4×5 Graflex SLR. We don’t have a filter mount for the Graflex, either, unfortunately, so we shot film in that with me holding the red 25 filter over the lens.

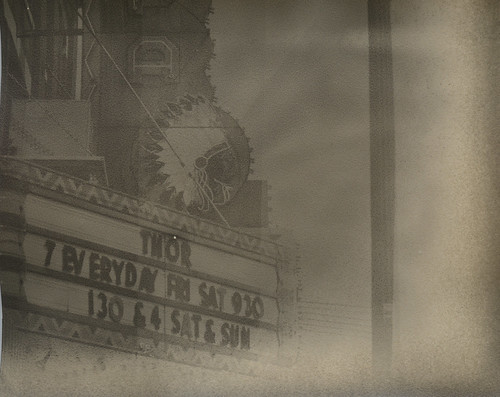
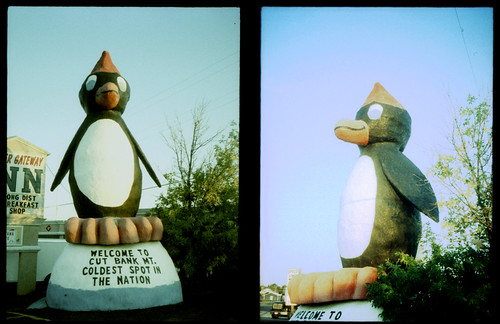
All of this would have been well and good, if we were shooting unexposed sheets of film. However, unbeknownst to us, what we were actually shooting were sheets of film that had already been exposed. I bought a lot of the Kodak High Speed Infrared film off of ebay a while ago, and got a few sealed boxes of film, and a few opened boxes. The film we used came from one of the opened boxes, and apparently the person I bought the film from had stuffed a few sheets of exposed but undeveloped film back in the film box and forgot about them. So, instead of our carefully thought out infrared test shots taken in the cemetery, we got this:

Carhenge

And this:

Mount Rushmore

So! That was a surprise! A bit of a bummer about our test shots not coming out, but kind of awesome found photos regardless. Strangely, both of these places, Carhenge and Mount Rushmore, are places that Travis and I went on our honeymoon, and even more strangely, I actually shot an infrared picture of Mount Rushmore then. Not on 4×5 film, though. Still – weird!

I didn’t feel like wasting any more of our infrared sheet film on test shots, though, so I think we’re just going to wing it on our trip. I may try taking a few pictures using the red gel filter and the pinhole camera, but I think I’ll probably just stick to using the infrared sheet film in the Speed Graphic, where I can get a proper filter in place (the shot we took with Travis’ Graflex SLR with me holding the filter over the lens barely came out – I suspect extra light leaked in around the edges).

I’m looking forward to playing with the silly gel filters on vacation. I had the thought to bring my Coronet 127 stereo camera along, and shoot pictures with a different colored gel filter inside each lens.

Dr. Funkenstein

That might turn out neat. Or obnoxious! Who knows! I respooled some rolls of color infrared film, too, taking the risk that I was ruining them in the process, so I can shoot color infrared with sprocket holes and cameras other than the 35mm. I hope I didn’t ruin them. That would really suck. Oh well. Too late now!

Whirl

I also ignored the fact that to date I haven’t been too awfully thrilled with the results I’ve gotten when I’ve tried shooting redscale film, and respooled a bunch of redscale film on a whim. I also bought a few rolls of the Rollei Nightbird film, which is pre-flipped redscale film. Actually, I bought a bunch of different rolls of the new Rollei films. I’ve only ever used a roll of their CR200 120 slide film, but I thought that roll came out really well, so I bought some more of their Digibase films to do weird stuff with. The Nightbird film has a variable ISO of 580 to 800, I think, so I might try shooting that with some of the gel filters. Because I really, really want to know what happens if you shoot redscale film with a green filter. Will it all turn out brown? I want to know!!

Oh, and as a point of interest for anyone else who shoots 127 format film, Freestyle Photo is selling the Rollei Nightbird (redscale) and Crossbird (E6 film meant for cross processing, so you can develop it either E6 or C41) in 127 format, so, yay, now there is some fresh, in-date 127 color film available to purchase again. Hooray!

Well, it’s time for me to get my butt back to cutting down more of the Fuji X-ray film. I feel like I’ll never see the sunlight again.